Beginning

I am a gourmand, not a gourmet, a food lover, not a food snob.
I hope to share my love of food with you through narratives, restaurant recaps,
menu suggestions, and recipes. Bon appetit!
(And if you blog about food, are you "flogging"?)

Sunday, January 22, 2012

A Vintage Meal


Vintage.  Retro.  Mid-century. 

You know you are getting old when these are the words that describe trends in fashion, interior design and architecture from your youth.

But when I think of cuisine from my childhood, which mostly encompassed the 1960s, I don’t think of it in such glamorous terms.  

As a child growing up in northern Wisconsin, I didn’t have a lot of access to gourmet food and fine dining experiences.  In fact, what I mostly recall are dishes with canned soups, Jello and processed cheese. 

This is not because my mother and other relatives weren’t good cooks.  They were.  

But their cooking was also circumscribed by the constraints of middle-class incomes, lots of kids and, consequently, a lack of time.  This was a pre-food processor, pre-microwave oven era. 

And there was a lack of product availability.  Take vegetables, for example.  It’s hard for us to remember a time when even the local grocery store didn’t have tomatillos, celery root or eight kinds of peppers. 

But for my mother, a child of the Depression and World War II, canned vegetables were the norm, frozen vegetables were an expensive and recent innovation, and fresh vegetables, other than root and seasonal, local vegetables, were hard to come by. 

I can remember the first time I had fresh broccoli at a friend’s home in the early 70s.  I came home raving about the “little trees.”  Broccoli is still my favorite vegetable.

So when I started planning a dinner party for friends of a “certain age,” I thought it would be fun to take some of the “swankier” dishes I remember from my childhood and teens—some I had only read about--and re-present them. 

My sincerest thanks to my Guinea pigs:  Jan, Dennis, John, June, and Malcolm.  And to my dear husband who did the grocery shopping and listened with enthusiasm as I talked through this menu again, and again, and again. 

A Vintage Dinner Party Menu

Miniature Twice-Baked Potatoes
Gougères
Roasted Shrimp Cocktail & Salad with Lemon Vinaigrette
Deconstructed Chicken Kiev
Quinoa Pilaf
Spinach Gratin with Roasted Red Peppers
Red Velvet Baked Alaska
Stinger Shooters & "Cigarettes"

The Recipes

Miniature Twice-Baked Potatoes

Twice-baked potatoes were always a special-occasion treat when I was growing up.  I’m sure my mother didn’t have time to do much of anything TWICE. 

These are a “toy” version of those tasty spuds.  I was going to stick a small piece of cooked bacon in each potato, but I ran out of time.  I’m sure a sprinkling of cheddar cheese either in or on the potatoes would be good, too. 

Source:  original recipe

Yield:  16 potatoes, appetizers for 6-8

Ingredients:

20 very small (about 1 to 1½-inch size) Yukon gold potatoes
Olive oil
Salt & pepper
2 T. buttermilk
4 T. sour cream, divided
4 T. snipped chives, divided

Preheat oven to 425°.  Line a baking sheet with heavy duty foil (I’m tired of washing baking pans.)  Place the potatoes on the foil-lined pan and drizzle with olive oil.  Mix the potatoes with the oil to coat.  Sprinkle with salt and pepper and mix again.  Roast the potatoes until fork-tender, about 20-25 minutes.  Remove from the oven and cool until the potatoes only warm to the touch.

Cut each potato in half horizontally.  Using the small end of a melon-baller, scoop out the cooked potato into a small bowl.  (For a short "ode" to the melon-baller, see "Summer (Jazz) Brunch.")  Reserve the potato “shells.” Using a fork or potato masher, mash the potatoes.  Add 1 T. buttermilk and 1 T. sour cream.  Mix to combine.  Add more buttermilk and sour cream to achieve a “rough” mashed potato consistency.  Season with salt and pepper and 2 T. chives. 

Using a small spoon, fill the potato shells with the mashed potatoes.  (You will probably not be able to fill all of the potato shells). 

These can be made 2 hours ahead and held at room temperature.  Before serving, rewarm on the baking sheet at 350° for about 10 minutes.  Meanwhile, fill a sandwich-sized plastic bag with the remaining 2 T. of sour cream.  Cut off one of the corners of the bag to make a ¼-inch hole.  When the potatoes are warm, remove them to a platter. Squeeze a small amount of sour cream on each potato, and sprinkle the potatoes with the remaining chives.  (I considered a caviar garnish, but I had to stop somewhere!)
Gougères

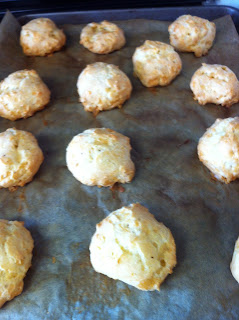
My first experience eating anything made out of a pâte à choux dough was when, as a child, I ate the delicious cream puffs at the Wisconsin State Fair held in Milwaukee, Wisconsin.  Real whipped cream (it IS the “Dairy State”) oozing out of pastries the size of babies’ heads!  Making the puffs is really quite easy, and I remember making éclairs when I was in my teens. 

These are a savory, appetizer version.  I did find a recipe from the 1960s for these, but it called for a stick of butter.  This more modern recipe is actually by the blogger and food writer who inspired me to start this blog. 

I think if I made these again, I would make them maybe half the size and adjust the cooking time.  I also might sprinkle some additional cheese on the top before baking.

They were a huge hit and completely devoured by my dinner guests.  You will have to take my word for it that the presentation—I piled them up in a gigantic martini glass—was perfect.  In the excitement of my hungry guests arriving, I forgot to snap a picture.

Source: Bon Appétit, April 2009 (Molly Wizenberg)

Yield:  Makes 2 dozen 1 ½-inch gougères

Ingredients:

1 c. water
3 T. unsalted butter (I used 4 T.)
¾ tsp. salt
1 c. unbleached all-purpose flour
4 large eggs, chilled
1 c. (packed) coarsely grated Gruyère cheese (about 4 ounces)
¼ tsp. freshly ground black pepper

Process:

Position 1 rack in top third and 1 rack in bottom third of oven; preheat to 400°F. Line 2 rimmed baking sheets with parchment paper.

Bring 1 c.  water, butter, and salt to simmer in heavy medium saucepan over medium heat, whisking until butter melts. Add flour; stir rapidly with wooden spoon until flour absorbs liquid and forms ball, pulling away from sides of pan. Stir vigorously until film forms on bottom of pan and dough is no longer sticky, 1 to 2 minutes longer. Remove pan from heat; cool dough 2 to 3 minutes. Using an electric mixer, beat in eggs 1 at a time. Stir in cheese and pepper.

Drop rounded tablespoonfuls of dough onto baking sheets, spacing about 3 inches apart. Using damp fingertip, press down any peaks of dough.

Bake gougères until golden brown, about 30 minutes, reversing position of pans halfway through baking. Using small sharp knife, pry open 1 gougère to check for doneness (center should be slightly eggy and moist). Serve hot or warm.

Can be made 3 hours ahead. Transfer to racks; cool. Rewarm in 350°F oven for 5 to 10 minutes.

Roasted Shrimp Cocktail 

As I’ve mentioned before, I LOVE shrimp.  (See Shrimply Delicious.

But shrimp cocktail seems especially vintage and indulgent when shrimp of this size are used.  So I decided to combine this classic first course with a salad.  The baby arugula and julienned radishes echo the peppery flavor of the horseradish in the cocktail sauce.  Roasting the shrimp makes all the difference in the flavor.

Source:   Back to Basics by Ina Garten

Yield:  6-8 servings

For the shrimp:

2 pounds (12- to 15-count) shrimp (I bought 3 shrimp per guest, which was plenty.)
1 T. olive oil
½ tsp. kosher salt
½ tsp. freshly ground black pepper

For the sauce:

½ c. chili sauce (recommended: Heinz)
½ c. ketchup
3 T. prepared horseradish
2 tsp. freshly squeezed lemon juice
½ tsp. Worcestershire sauce
¼ tsp. hot sauce (recommended: Tabasco)
1 hollowed out lemon half per guest for cocktail sauce, bottoms sliced so lemons will stand

Process:

Preheat oven to 400°.  Peel and devein the shrimp, leaving the tails on. Place them on a sheet pan with the olive oil, salt, and pepper and spread them in 1 layer. Roast for 8 to10 minutes, just until pink and firm and cooked through. Set aside to cool. For the sauce, combine the chili sauce, ketchup, horseradish, lemon juice, Worcestershire sauce, and hot sauce. Serve as a dip with the shrimp.

Salad with Lemon Vinaigrette

Source for Lemon Vinaigrette:  Bon Appétit, December 1998

Yield:  Makes about 3/4 cup

Ingredients:

½ c. olive oil
3 T. fresh lemon juice
1 T. minced shallot (I left this out)
1½ tsp. Dijon mustard
½ tsp. grated lemon peel
½ tsp. sugar

Process

Whisk all ingredients in bowl to blend.  Season with salt and pepper. (Can be made 1 day ahead. Chill. Bring to room temperature before using.)

For the salad:

Source:  original recipe

Yield:  6-8 servings

Ingredients:

8 c. mixed greens (I uses a mix of baby spinach and baby arugula)
½ c. julienned radishes (about 4-5 radishes)

Process:

Before serving, lightly dress greens with vinaigrette.  Sprinkle salad with radishes.

To assemble shrimp cocktail and salad:

Fill the hollowed out lemon halves with about 2 T. of the cocktail sauce.  Place a filled lemon half and 3 shrimp on each plate.  Place some of the salad on each plate.

Deconstructed Chicken Kiev

O.K. the name of this recipe is very tongue-in-cheek.  In fact, I thought about calling it “Plan B Chicken.”  I had intended to make Chicken Kiev, a quintessential “vintage” dish and one I actually made in my early cooking days in the mid-70s.  

But breasts are bigger than they used to be in the 70s—including the breasts of chickens. 

Chicken Kiev is made of very thin pieces of chicken that are wrapped around chilled butter and then pan-fried.  It’s important that the chicken completely encase the butter. 

However, even though I gently pounded the huge chicken breasts my husband had purchased, I couldn’t get them thin enough to roll around the chilled butter to make Chicken Kiev.  In retrospect, I might have had the butcher cut scaloppini, or I might have cut the breasts horizontally myself.  

Anyway, I didn’t, and I was left with uneven and too-small pieces of chicken.  

So, having already made the compound butter—truffle butter was my plan to “modernize” the dish—I decided to “schnitzel” the chicken and use the butter in a sauce.  

Schnitzel is not really a make-ahead kind of dish, so frying the chicken while my guests were in the living room made me a little nervous.  But it worked!  I think my German mother-in-law would have been proud.

Source:  original recipe

Yield:  8 servings

8 skinless boneless chicken breast halves, pounded to 3/4-inch thickness (about 2 ½ pounds total)
Salt & pepper
1 c. flour
3 eggs, lightly beaten
2 c. panko (Japanese breadcrumbs) 
vegetable oil
2 T. freshly squeezed lemon juice
1 stick (8 T.) truffle butter (recipe follows)
1 c. dry white wine
Lemon wedges for serving

Between two sheets of plastic wrap, pound each breast to ½-¾-inch thickness.  Blot the chicken with paper towels.  Lightly season the chicken with salt and pepper on both sides.  Place the flour, eggs and panko in 3 different pie plates or shallow bowls.    In two large frying pans, pour enough vegetable oil to reach about ½-inch high.  Heat oil until smoking and then add 1 T. of the truffle butter to each pan.  Working quickly, coat both sides of each chicken breast with flour, then egg and then panko.  Cook chicken in the butter-oil until browned, crisp, and cooked through, turning once, about 4 minutes per side. Transfer chicken to platter.  Tent loosely with foil.  

Drain one of the frying pans of most of the oil, leaving brown bits on bottom.  Over medium-high heat, deglaze the pan with the wine and lemon juice, whisking and cooking until reduced by about half.  Whisk in at least 4 T.of the truffle butter, one tablespoon at a time.  To serve, drizzle the butter sauce on the chicken.

Truffle Butter

1/2 cup butter, softened
4 tsp. truffle oil
¼ tsp. salt
¼ tsp. black pepper

In a small bowl combine the ingredients with a fork until blended.  Chill until almost firm.  Using plastic wrap, form the butter into a log about the size of a stick of butter.  Chill until ready to use.  (Leftovers can be frozen.)

Quinoa Pilaf

Source:  Foodnetwork. Com

Yield:  4-6 servings (in parentheses are my modifications for 8 servings)

Ingredients:

1 T. olive oil (1 T + 1½ tsp.)
1 med. onion, peeled and chopped (1 lg.)
½ cup crimini mushrooms, wiped clean and thinly sliced  (3/4 c. I chopped them for a finer texture)
1½ c. quinoa, rinsed well and drained  (2 c.)
½ tsp. fresh thyme leaves removed from their stems (3/4 tsp.)
11/2 tsp. kosher salt (2 tsp.)
Pepper, freshly ground
3 c. chicken broth (4 c.)

Process:

Place a saucepan on high heat and get it hot. Add the olive oil and swirl it around to make sure the entire surface is covered with oil. Add the shallot and sweat (cook until translucent but not brown). Add the crimini mushrooms and cook until brown. Add the quinoa, thyme leaves, bay leaf, kosher salt and black pepper to the pan and stir. Let the ingredients heat up and roast a little to bring out all their fullest flavors. The steam coming up should be very aromatic.  Slowly and carefully add the vegetable stock (it will spatter because the pan and ingredients are hot). When it comes to full boil, reduce the heat to a low simmer, cover and allow to steam for about 15 minutes. After 15 minutes, turn off the heat, remove lid and fluff the quinoa and then replace the lid and allow to sit for about 10 minutes.

Spinach Gratin with Roasted Red Peppers

When I asked my husband what vegetable dish he remembered most fondly from his childhood, he didn’t hesitate a second before replying, “Creamed spinach.”  This is Ina Garten’s recipe. 

Although she’s known as the “Barefoot Contessa,” I think of her as “The Food Queen.”  And if she says frozen spinach is acceptable, it is!

But with apologies to Her Highness, I added roasted peppers to this dish.  The flavor and color of the peppers put this over the top.  This would be a great make-ahead Christmas dish.  

Source:  Parties! by Ina Garten

Yield:  8 servings

Ingredients:

4 T. (½ stick) unsalted butter    
4 c. chopped yellow onions (2 large)
¼ c. flour
¼ tsp. nutmeg grated nutmeg
1 c. heavy cream
2 c.  milk
3 lbs. frozen chopped spinach, defrosted (5 (10-ounce) packages)
3 red bell peppers, roasted, charred skin removed, cut into strips (can be omitted)
1 c. freshly grated Parmesan chees
1 T. kosher salt
½ tsp.  freshly ground black pepper
½ c. grated Gruyère cheese

Process:

Preheat oven to 425°.   Melt the butter in a heavy-bottomed sauté pan over medium heat. Add the onions and sauté until translucent, about 15 minutes. Add the flour and nutmeg and cook, stirring, for 2 more minutes. Add the cream and milk and cook until thickened. Squeeze as much liquid as possible from the spinach and add the spinach to the sauce. Add 1/2 cup of the Parmesan cheese and mix well.  Season, to taste, with salt and pepper. Transfer the spinach to a baking dish.  (I used a fairly large gratin dish.)  Stir in the peppers, if using.  (At this point, I refrigerated the gratin.  The next day I brought it to room temperature before proceeding.)  Sprinkle the remaining ½ c. Parmesan and the Gruyère on top. Bake for 20 minutes until hot and bubbly. Serve hot.

Red Velvet Baked Alaska

A quick glance at Wikipedia (I’m sorry!) tells me that this show-stopping dessert has been around for a very long time, but that it was given the name “Baked Alaska” in 1876 at Delmonico's Restaurant to celebrate the acquisition of the territory of Alaska.  

It’s a dessert that, to me, screams 1960s indulgence and exhibition.  

Another dessert that reminds me of the 60s and 70s is Red Velvet Cake, also known as Waldorf Astoria Cake.  I first had this luscious cake at the home of my BFF, Patti, when I was in high school.  Her mother, Gloria Juetten, iced it with a great cream cheese frosting.  I’ll admit I mostly think of cake as a “frosting deliverer,” but, oh, what a delivery!

So my idea was to combine all these food memories in this dessert.  It was, if I do say so myself, amazing.  

This is my ice cream maker--it's a non-electric "chill chamber."
Cream Cheese Ice Cream

My family members shake their heads in disbelief that I, a Wisconsin native, don’t really like ice cream.  

Maybe it was all that un-homogenized milk I was forced to drink as a child.   I hated those “clunks” on the top of a newly-opened bottle of milk.  This milk, by the way, was delivered in glass bottles twice-weekly and placed by the milkman in the insulated milk box outside our back door.  

So here’s a “double diary” ice cream recipe, and it, surprisingly, might just be my favorite ice cream ever.  

Source:  Gourmet, April 2003

Yield:  Makes about 1 quart

Ingredients:

8 oz. cream cheese, softened
1 cup milk
1 tablespoon fresh lemon juice
3/4 cup sugar
1/8 teaspoon salt
1/2 cup heavy cream

Process:

Blend cream cheese, milk, lemon juice, sugar, and salt in a blender until smooth. Transfer to a bowl, then stir in cream. Freeze cream cheese mixture in ice cream maker. Transfer to an airtight container and put in freezer to harden, at least 2 hours. 

To make the Baked Alaska, line a 9” X 5” loaf pan with plastic wrap.  Spoon the soft ice cream into the pan.  Freeze.

Even uncooked this red batter looks so yummy!
Waldorf Astoria Cake

Source:   Gloria Juetten, mother of my dear friend Patti Seaman

Yield:  2 8-inch layers (measurements for one layer are in parentheses)

Ingredients:

½ c. shortening  (¼  c.)
1 ½ c. sugar  (¾ c.)
2 eggs (1)
¼ c. red food coloring (2 T.)
2 T. cocoa (1 T.)
2 ¼ c. sifted flour (1 c. + 2 T.)
1 t. baking soda (½ tsp.)
1 t. salt (½ tsp.)
1 c. buttermilk (½ c.)
1 tsp. vanilla (½ tsp.)

Preheat oven to 350°.  Grease and flour 2 8-inch round cake pans.  In a large bowl using an electric mixer, cream the shortening and sugar until light and fluffy.  Beat in the eggs and food coloring until well mixed.  In a medium-sized bowl, mix the dry ingredients, sift the dry ingredients together. In a small bowl or glass measuring cup, mix the buttermilk and vanilla with a fork.  At low speed, mix in 1/3 the dry ingredients until well mixed and then mix in ½ of the buttermilk mixture until well mixed.  Continue with 1/3 of the dry mixture, ½ of the buttermilk mixture and ending with the remaining 1/3 of the dry mixture. 

Pour the batter in the prepared cake pans and bake on the center rack for approximately 30 minutes or until a toothpick or cake tester comes clean.

For the Baked Alaska:  Prepare one-half of the recipe, using measurements in parentheses.  Pour batter into 8”X8” lined with parchment paper, greased and floured.  Bake for 20 minutes.  Cool 10 minutes in the pan and then remove to completely cool on a wire rack.  Cut the cake to fit on top of the ice cream in the loaf pan.  You will have to cut a strip to fit the end of the loaf pan, and you will have some cake left over--darn!

Wrap the loaf pan with the ice cream and cake in plastic wrap and freeze. (Make ahead:  this can be done  several days ahead of serving.)

Meringue

Ingredients:

4 egg whites, room temperature
½ tsp. lemon juice
Pinch cream of tartar
1/3 c. sugar

Process:

With an electric mixer, beat the egg whites, lemon juice and cream of tartar until frothy.  Gradually beat in the sugar until stiff peaks form.  

To assemble and finish:

Remove the ice cream and cake from the pan and plastic wrap and place on a baking dish.  Using an off-set spatula, spread the meringue over the ice cream loaf completely encasing it and finishing with little “peaks.”  (Make ahead:  The meringue can be prepared and spread on the cake several hours before serving.  Place in freezer before continuing.)  Preheat oven to 500°.  Bake dessert for 3 minutes until the peaks of the meringue are browned.  Slice and serve.  

Stinger Shooters

If this were truly a 1960s  meal, we would have started out with serious cocktails—Martinis, Manhattans, Old Fashioneds and the like.  Maybe it’s just me, but I don’t think we have the drinking stamina we used to have.  

But I thought I’d present, more as an after-dinner liqueur, shot-sized Stingers.  These remind me of my step-father, Ron Douglas, who introduced me to Dr. McGillicuddy’s Mentholmint Schnapps in a Stinger at the Fireside Restaurant in Rhinelander, Wisconsin.  I served these with Pepperidge Farm Pirouette rolled cookies to stand in for cigarettes.  

Yield:  6-8 shot-sized servings

Ingredients:

½ c. brandy
½ c. white crème de menthe (which is actually colorless)
1-2 shots water

This is a make-ahead recipe.  Combine all the ingredients in a small pitcher jar.  Chill. (If making to serve immediately, skip adding the water and shake or stir with cracked ice.  Strain and serve.)  


Wednesday, December 28, 2011

Tweaking Christmas Tradition: Lefse & Meatballs

I'm not sure if it’s because I’m rebellious or just lazy or both, but when it comes to holiday traditions, I’m not very traditional. 

Don’t misunderstand.  I believe in giving thanks (and not just once a year) and rejoice in celebrating the birth of Christ at Christmas and His death and resurrection at Easter.

But some of the "add-ons" to holidays seem a bit, well, added on.

I'm all for family customs, but I resist ones that require an inordinate amount of effort  (usually for the women of the family) and result in less family time rather than more.    

Take Thanksgiving, for example.  I haven’t cooked a Thanksgiving turkey in about 15 years preferring instead, if we are celebrating by ourselves, that my husband, our adult daughter, and I dine at one of the near-by plantations with restaurants that serve wonderful, if pricey, holiday buffets.  No shopping, no prep, no clean-up--just our small family giving thanks and being together.

This Thanksgiving, my personally-selected meal from the offerings at Houmas House consisted of boiled shrimp, marinated crab claws and smoked salmon.  That suited me fine since I’ve always found turkey to be a rather bland and dry accompaniment to the tastier side dishes.  Of course, I did make a pumpkin pie for our "second" dessert--that's non-negotiable.

And then there are the Christmas food traditions.  Last Christmas, we ate Christmas day dinner in a Mexican restaurant in Epcot in Disneyworld.  This year, traveling home from Universal Studios in Orlando on Christmas Day, we ate breakfast at a Waffle House (they ARE always open) and dinner at a (gulp) Hooters since the only other alternative was another Waffle House.  Thank God for the people who work on holidays so that travelers have a place to eat! 

[Why do we go to theme parks for Christmas, you might ask.  Well, there is nothing like screaming in terror on a roller coaster or shaking hands with over-sized cartoon characters to bring a family together.]

But no matter how or where we untraditionally spend the days around Christmas, there is one food tradition I must keep and that is having lefse and meatballs as close to Christmas Eve as possible.

Lefse is a soft Norwegian flatbread made out of potatoes.  Rounds of lefse are similar in appearance to flour tortillas but are much larger in size and thinner.  The simplest way lefse is served is by spreading butter on a quarter-round and rolling it up.  Often the butter is sprinkled with cinnamon and sugar before the lefse is rolled up for a for a sweeter snack.  Lefse is also eaten wrapped around savory items, such as sausage or the much-maligned Scandinavian dish, lutefisk.

[Lutefisk side note:  Lutefisk is made by rehydrating dried cod in lye water for several days after which it is baked or boiled for serving. The result is gelatinous and odiferous, and people either love it (or lie about loving it) or detest it.  My maternal grandmother, whose parents emigrated from Norway, claimed that in the “olden days” the lutefisk was stored outside the small grocery stores on racks or in barrels and that passing dogs would “assist” in the curing process by relieving themselves on the lutefisk.  I think my grandma was a lutefisk-hater.]

My grandmother, Grandma T. as we called her, always made lefse around the holidays and served it as an accompaniment to a Christmas Eve meal that featured meatballs in gravy.  (For ease of explanation, I would call them Swedish meatballs, but that sounds a bit traitorous.) 


Family legend has it that at one of these meals before I was born, my father, of German and not Norwegian heritage, wrapped some of his meatballs IN his lefse—and a new family tradition was born.   Ever the perfectionist, my father carefully schooled us in lining up 2 or 3 meatballs at the edge of a quarter-round of lefse and tucking up the bottom before rolling it up to prevent all the wonderful gravy from dripping to our plates.

Making lefse at home is not for the faint of heart—but when have Norwegians been faint of heart?  (See description of lutefisk above.)

It is a labor-intensive undertaking that requires peeling, boiling, and ricing huge quantities of potatoes to make the dough and a special rolling pin, griddle and turning “sticks.”  Thankfully, my dear Auntie Joyce has taught some of my sisters and cousins how to make lefse in all-day sessions she calls “Lefse 101.”   


I haven’t learned how to make lefse yet, but it is on my “bucket list.”  Until that time, I order my lefse from Granrud’s Lefse in Opheim, Montana, which offers good quality and reasonably-priced lefse and doesn’t require that you by a crazy amount as some companies do.  Also, until they recently started using Pay-Pal, Granrud’s trusted you to send a check after you received your lefse.  I love that!

Following is my version of the traditional family Christmas Eve menu. 


Meatballs in Gravy

Source:  adapted from my mother’s recipe

Yield:  4-6 servings (one-half of meatball recipe)

Meatballs:

3 lb. ground beef (80-20 mix is best for moist and tender meatballs)
½ c. minced onion
1 c. dry bread crumbs
1 tsp. salt
½ tsp. pepper
¼ tsp. nutmeg

Preheat oven to 350°.  Place meat and onion in a large bowl.  Mix dry ingredients in a small bowl.  Add to meat and onion in increments mixing with your hands until all ingredients are combined.  Form small, walnut-sized balls by lightly rolling the meat between your hands; don’t overwork or condense the meat too much.  Place the meatballs on an ungreased baking sheet and bake until no longer pink in side (about 20 minutes).  The meatballs can be baked as follows, refrigerated or frozen.

I usually only serve one-half of the meatballs preparing them as following:

Gravy:

1 can French onion soup
1 can cream of chicken soup

Preheat oven to 350°.  Whisk the two undiluted soups together in a 2-quart casserole dish.  Add the meatballs and bake covered for 1 hour or until bubbly.  Serve with lefse and/or over egg noodles (for non-Norwegian guests).

I know, I know—canned soup and “cream of X” at that!  But the flavor and consistency of the gravy is great.  I have also used a can of beef broth with a can of cream of onion.  My mother used one can each of cream of onion, cream of celery and chicken broth, which is probably enough for all 3 pounds of meat.


Carrots with Brown Butter Dill Sauce

Carrots and dill are a pretty classic combination, but the dill also echoes the Scandinavian notes of the menu.

Source:  original recipe

Yield: 4 servings

Ingredients:

1 lb. baby carrots
3 T. butter
2 T. chopped fresh dill

Chopping herbs is so easy with a mezzaluna.

Process:

Steam or boil the carrots until tender.  Meanwhile, in a small frying pan, whisk the butter over medium-low heat just until the butter browns.  The butter should smell nutty; don’t overcook.  Remove from heat.  When the carrots are done, toss with the browned butter and dill.  Season with salt and pepper to taste.  Serve immediately.

Scalloped Corn

This is one of those dishes in the “comfort food” category.  I only updated the way my grandmother and mother made it by using the food processor.  I think a sprinkling of shredded Swiss or Gruyère cheese on the top during the last 5 minutes of baking would enhance the nutty flavor of the corn.

Source:  old family recipe card

Yield: 4-6 servings

Ingredients:

12 soda crackers
2 eggs
¾ c. milk
1 15-oz. can creamed corn
Salt & pepper, to taste

Process:

Preheat oven to 350°.  In a food processor, pulse the crackers into medium-fine crumbs.  Add the eggs and pulse until blended.  Add the milk and corn and pulse until blended.  Season lightly with salt and pepper.  Pour the corn mixture into a 2-quart glass baking dish lightly sprayed with cooking spray.  Bake for 1 hour until set and lightly brown on top.


Eggnog Pudding

This is a quick and holiday-flavored dessert that is perfect if you are short of time and aren’t, as I am not, a Christmas cookie baker.

Source:  original recipe

Yield: 4 servings

Ingredients:

1 package vanilla instant pudding
1½ c. purchased eggnog
½ c. milk
Small pinch each of nutmeg, cinnamon, cloves and ginger
15 ginger snaps, crushed
½ - ¾ c. whipping cream
1 tsp. rum extract
1 T. sugar

Process:

Prepare the pudding according to package instructions using the eggnog and milk as the liquid.  Whisk in the spices.  Sprinkle approximately 1/8 of the ginger snap crumbs onto the bottom of 4 serving dishes or glasses.  Pour in 1/8 of the pudding on top of the ginger snap crumbs.  Sprinkle the remaining (reserving 2 tsp.) ginger snap crumps over the pudding layer and top with the remaining pudding.  Whip the cream with the extract and sugar until soft peaks form.  Mound the whipped cream evenly on the top of the pudding in each dish.  Garnish each pudding with ½ tsp. crumbs.  Chill at least one hour before serving. 

Sunday, August 28, 2011

Cold BLT Soup

When I was a child, I looked forward to spending part of each summer at my paternal grandparents’ house in Milwaukee.  Often I spent several weeks there, usually visiting them by myself.  As the oldest of five children, doing anything alone was a rare treat, and having the undivided attention of my grandparents was wonderful.

Highlights of these visits were trips with my grandma, or Nana as we called her, from their home in west Milwaukee to downtown Milwaukee.  A trip downtown was an event, one that required wearing dresses, and a hat and gloves for Nana, and taking two city buses to get there.

After our shopping or appointments, we often ate lunch at a downtown diner, sitting at the counter, and I ordered the same meal every time—a BLT sandwich. 

A BLT is still my favorite sandwich and one I don’t intend to “gourmet-itize” either.  Once I had a fleeting thought of an upscale version with heirloom tomatoes, homemade mayonnaise, baby greens, applewood smoked bacon—you get the picture.

But I just couldn’t compromise my memory of a few strips of Oscar Meyer bacon, a leaf or two of iceberg lettuce, a slice of tomato, a slathering of Miracle Whip, all on toasted and buttered “store-bought” bread.  That’s how I’ll always make my BLTs. 

If I tweak the sandwich at all, it’s only by slicing it diagonally and sticking in ruffled toothpicks in the halves—just like they did in that downtown Milwaukee diner.

While I don’t fiddle with the sandwich, I have used its flavors as an inspiration for two other dishes.  One was a BLT quiche which I created for my Summer (Jazz) Brunch, and another is this cold BLT soup.

This soup is on the order of a gazpacho.  You'll notice that the "L" of this soup is not lettuce but cucumber.  That's because, of course, after a few minutes lettuce wouldn't fare well swimming around in the soup--think of the sogginess of an overdressed salad.  But I think the cucumber works well providing the pleasant crunch without an overpowering flavor.

I served the soup with my second-favorite sandwich--grilled cheese.  


Cold BLT Soup
Source:  original recipe

Yield: 4 servings

Ingredients:

6 slices bacon
1 can tomato soup, undiluted
1 cup water
2 c. tomato juice
2 c. spicy V-8 juice (or 2 additional c. tomato juice)
2 T. balsamic vinegar
2 T. red wine vinegar
1 large cucumber, peeled, seeded, chopped
4 plum tomatoes, chopped
Salt and pepper to taste
2 T. Miracle Whip
2 T. sour cream
4 slices bread
Butter
1 green onion, chopped (green part only)

Process:

Slice the bacon horizontally in ½- inch pieces.  Brown the bacon in a non-stick skillet until brown and crispy.  Remove and drain on paper towel.  Pour off most of the bacon grease, leaving a “coating” on the bottom of the pan. (If making ahead, store the bacon pieces in an airtight container in the refrigerator.) 

Butter the bread on both sides and cut into 1-inch squares.  Brown the bread in the skillet until browned, crisp and dry.  Remove from pan.  (If making ahead, store in an airtight container at room temperature.)

In a large bowl or plastic container combine the soup, water, juices, vinegars.  Whisk to blend.  Add the vegetables.  Refrigerate until serving.

Combine the Miracle Whip and sour cream together in a small bowl.  Refrigerate, covered, until serving.

To serve, ladle the soup into bowls.  Place a tablespoon of the sour cream mixture on the center of each bowl of soup.  Divide the bacon, croutons, and green onion evenly and sprinkle over the soup.

Thursday, June 23, 2011

Middendorf's Restaurant

You don’t have to own a boat to be able to get to Middendorf’s Restaurant.

Located on the Lake Maurepas end of Pass Manchac (which connects Lake Maurepas to Lake Pontchartrain), Middendorf’s is accessible by car, but it definitely adds to the experience of eating at this “old school” seafood restaurant if you can tie your boat up, be that a bateau or a yacht, and make your way up one of the docks to the best catfish ever! 

We have eaten at Middendorf’s several times, but not recently, and we were delightfully surprised by same changes to the nearly 77-year-old establishment.

The boat docks, which are “staged” with nets, crab traps and other nautical objects, lead to a new, large covered waterfront deck that has a bar and tables for dining and/or cocktails.  This area would make Jimmy Buffet proud with its tropical frozen drink menu and fan-misters.  There’s also a sandpit for children to play in.
 
Following damage from Hurricane Ike in September of 2008, the restaurant building itself was renovated.  The new dining room, called the Sunset Room, is light-filled and has a large artificial tree in one corner.  We were seated in the old dining room which, while freshened up a bit, still retains that formica-topped-table charm. 

For an appetizer we inhaled crawfish cakes.  Crispy, but not oily, on the outside, tender, but not overly-bready, on the inside, I think I might like these better than less-flavorful crab cakes.

For my entrée, I ordered the fried shrimp, and if you read the previous posting, you know how I feel about shrimp.  These weren’t the best I’ve ever eaten (I’ll have to write about Catfish Charlie’s some time), but they were in the “top ten,” and the portion was very generous.  I think I counted fourteen shrimp!  

Usually, I pass on the nest of French fries on which fried shrimp are usually served.  Maybe it was all the fresh air from the boat ride there, but I ate all those obviously homemade fries.  I did pass on the rather bland coleslaw.

Middendorf’s is known far and wide for its catfish which is available thick cut or thin cut.  Now, I need to state that in all honesty catfish is not my favorite fish—maybe it was all that Walleye I ate during my formative years in northern Wisconsin.  To me, catfish sometimes has a dirty or muddy taste. 

If you feel the same, try Middendorf’s thin-cut fried catfish and prepare to be converted.  After your teeth bite through the piping hot crispy crust, the fish is so delicate and tender it almost melts in your mouth. 

Here’s the other wonder about their thin-cut catfish.  It tastes as good, if not better, cold!  I always think leftover fried fish is somewhat disappointing, but not Middendorf’s.  In fact, that evening my husband and I took turns sneaking a bite from the refrigerator until the Styrofoam box was empty.

You won’t find an extensive wine list, although you will find some good homemade desserst, such as bread pudding and cheesecake. 

But go to Middendorf’s for the catfish—and if you can, go by boat.  

Friday, May 20, 2011

Shrimply Delicious

In northern Wisconsin, where I spent the first 18 years of my life and where I return for a month each summer, there is no shortage of good fish in the area’s hundreds of lakes—perch, walleye, bass, northern. 

And if you don’t want to personally catch those fish, you can dine on an array of them at any good local restaurant, especially if you partake of the sacrament of the Friday night fish fry.  (Look for a future post!)

But despite all those tempting fish in the water or on the plate, at an early age I fell in love with the very un-local seafood—shrimp.

When our parents braved the challenge of taking five young children out for dinner, invariably most of us would order fried shrimp which was then, as it often is today, one of the most expensive entrées on the menu.

Those six or seven shrimp would come out glistening from their hot oil bath and resting next to a bed of French fries.  The requisite cocktail sauce came in a small metal dish (none of those plastic sushi-soy sauce containers).  I loved the taste of those shrimp so much that I always chewed and swallowed the crunchy tails, and I still do.

Later when I was paying for my own restaurant dinners, my eyes and saliva glands always gravitated towards dishes with shrimp:  shrimp cocktail, shrimp fajitas, shrimp pad Thai, shrimp scampi, shrimp fried rice.

And now, decades later, I live in shrimp nirvana! Because shrimp are local to south Louisiana, Cajun and Creole cuisines abound with shrimp dishes:  shrimp bisque, shrimp gumbo, shrimp remoulade, barbecue shrimp, stuffed shrimp, shrimp étoufée.

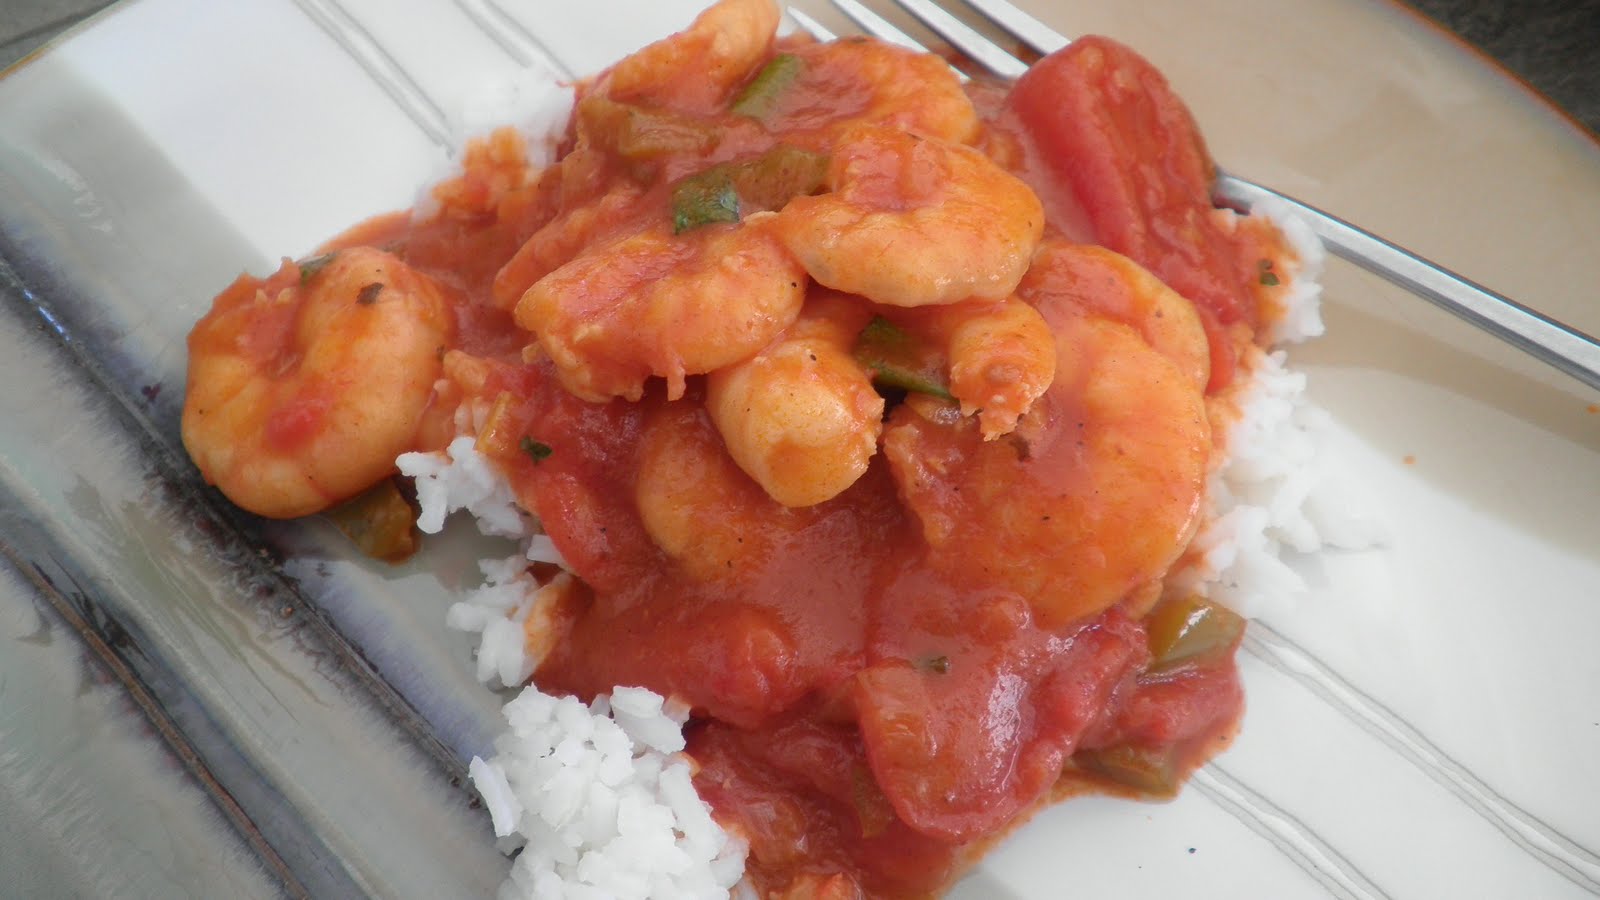
And, Shrimp Creole—shrimp in a  rich and spicy tomato sauce served over rice.  Below are two Shrimp Creole recipes—a fast one and a slow one.  The heat of both can be adjusted with hot sauce, preferably Crystal,which has more of a tomato-vinegar taste, or Tabasco, which is more "pure heat."

For either recipe I try to buy wild-caught shrimp.  Unfrozen and unpeeled have the most flavor, but they do require more prep time.  I usually buy 31-40 count (pieces per pound) shrimp so there are more bites per mouthful. 


Speedy Shrimp Creole

Source:  original recipe

Yield:  2 servings

Ingredients:

1-2 T. olive oil
1 small onion, chopped
2 celery stalks, chopped
½ green pepper, chopped
1 can Rotel Original® tomatoes, undrained
2 c. water to start
1 T. tomato paste*
½  tsp. oregano
½  tsp. thyme
Tabasco or other hot sauce, to taste
salt and pepper, to taste
1 lb. medium shrimp, peeled & deveined

*I always freeze leftover tomato paste in tablespoon dollops on a baking sheet and then store those in a freezer bag in the freezer to add to recipes such as this.

Process:

Heat the oil in a large frying pan on medium heat.  Add the onion, celery and green pepper, and sauté until soft.  Add the tomatoes, tomato paste, water and seasonings.  Simmer for 15-20 minutes, adding more water if necessary.  Add the shrimp and cook until the shrimp are opaque.  Serve with cooked rice.


Slow Shrimp Creole

This recipe takes a while—allow at least two hours.  But the result has, as they say in “chef speak,” depth of flavor.  So many south Louisiana recipes begin with the instructions “First, you start with a roux” that many of them don’t even bother to explain how you make a roux.  It’s not a complicated process—just non-stop, vigilant stirring.  

I know there are jarred store-bought roux mixes that people say are very good, but there is something rewarding, almost therapeutic, about stirring the roux constantly for about a half-hour to get that wonderful, nutty base.

Source:  adapted from an old clipping from The Advocate (Baton Rouge newspaper)

Yield:  10 generous servings

Onions, bell pepper, and celery:  the  "holy trinity" of Cajun cuisine
Ingredients:

½ c. flour
½ c. oil
2 c. chopped onions
1 c. chopped celery
½ c. chopped green pepper
2-3 cloves garlic, chopped
2 (14-oz.) cans stewed tomatoes, undrained
5-6 c. water
1 T. Crystal Hot Sauce
2 T. Worcestershire sauce
 2 t. salt (instead of the salt and peppers I used 2 tsp. Tony Chachere’s Creole Seasoning)
¼ t. red pepper
½ t. black pepper
½ t. oregano
½ t. thyme
2 ½ t. sugar
2 lbs. peeled raw medium-size shrimp (I sometimes use 3 lbs.)
2 T. chopped parsley
2 T. chopped green onion tops

Process:

(Be sure to chop the vegetables before you start the roux.)  Make a roux of flour and oil. (Translation for Yankees:  Combine the flour and oil in a large, heavy pot.  Stir constantly over low heat, about 25 minutes for this recipe.)  

When the roux is browned to a dark caramel color, add onions, celery, bell pepper, and garlic and cook until soft, stirring to prevent sticking and to coat the vegetables evenly with the roux.  Add tomatoes and tomato paste.  Mix well and cook about 5 minutes.  Then add 5 cups water.  Let simmer for 5 minutes then add seasonings and sugar.  Stir and taste.  Simmer for 1 hour.  Add shrimp and cook until opaque.  Add parsley and green onion tops and cook for about 5 minutes. Serve over rice.


Friday, March 25, 2011

Coquette

One of the great benefits of having a daughter in college in New Orleans is that we have an excuse to drive there at the drop of a hat for meals, especially to celebrate her special days, such as her twenty-second birthday. 

For this occasion, we ate at Coquette at 2800 Magazine Street.  This is a restaurant I’ve been hearing about for a few years.  Chef Mike Stolzfus worked at Restaurant August before opening Coquette in December of 2008 and was nominated this year as a “People’s Best New Chef (Gulf Region)” by Food & Wine Magazine. 

Reservations at 1:30 on a Saturday were necessary, and we were seated in the filled-to-capacity front downstairs dining room that “ells” around the inviting bar.   Waiting to be seated, our daughter expressed our feelings about dining in the Crescent City when she said, “I love that in New Orleans you can get really ‘high end’ food in a comfortable setting.”  I couldn’t have put it better myself. 

Our first impression of Coquette was the wonderful cocktail menu which includes a solid wine list and both classic and original concoctions.  My husband chose the quintessential New Orleans cocktail, the Sazerac (with absinthe), while my daughter chose the restaurant’s Coquette Collins, an inventive twist on a Tom Collins.

Coquette also features drinks that contain “house infusions.”   When I asked our waiter about the bacon bourbon, not only did he explain the brewing process, but he brought us a small sample—which tasted like a wonderfully smoky single malt Scotch.

O.K. this has to be one of the fine dining bargains in New Orleans:  a three course lunch menu for $20! 

There were three choices per course, and our waiter told us that while some items are offered consistently, many change daily.   

The first course options included a gumbo and a salad with a crispy pig ear and soft-boiled egg, which my husband seriously considered as his choice.  Ultimately, we all picked the Roast Oysters which consisted of four generous roasted oysters nestled in rock salt and topped with a fennel and bacon ragout and horseradish cream.  Observing the number of plates of this appetizer that were whisked by us during our meal, this dish is deservedly a house favorite.

For our second course, we each selected a different entrée.  My husband chose the pork belly which was somewhat of an Asian dish.  The several slices of crispy sautéed pork belly were served to be wrapped in pieces of Bibb lettuce with pickled vegetables and dipped in a spiced yogurt sauce.   The small taste he allowed me was fantastic.

My daughter chose the Gulf Shrimp with grits, a classic presentation enhanced with cippolini onions and fennel.  The dish was generous and delicious. 

I chose the Ricotta Gnocchi.  Not only were the gnocchi feather-light, but the sweetness of the diced butternut squash played off the saltiness of the chopped  Benton’s country ham in the brown butter sauce nicely.

The dessert course found us two-against-one.  My husband and daughter chose the beignets.  These were four or five round and puffy beignet, sprinkled with powdered sugar.  There were two small dipping “pots,” one of a fluffy chocolate-coffee pot de crème and the other of a caramel sauce.  I chose the panna cotta which was topped with slices of blood orange and a small dice of candied fennel—an unusual, but refreshing combination.

In a “foodie” city like New Orleans, Coquette is definitely a serious, but accessible, contender. 

Tuesday, February 15, 2011

Valentine's Day

Since I was totally indulged on my birthday weekend (see previous two blogs), I felt I owed the love of my life a very good Valentine’s Day dinner. And what man doesn’t love a steak and baked potato meal? But it had to be the BEST steak and baked potato meal.

After dinner, my husband encouraged me to continue perfecting this meal, but I’m thinking that he said this not because this was “sub-par” but because he wants more of the same! So, ladies, I’m pretty sure that this is the way to your man’s heart.

Pimento Cheese & Crackers

O.K. I know you are shaking your heads. But my husband, being a proper Southern gentleman, LOVES pimento cheese and, oddly enough, does not like it homemade. So I bought some “store-bought” pimento cheese from our Baton Rouge family-owned grocery store, Calandro’s, and served it with crackers.

Steakhouse Steaks

This recipe is from How Easy is That?, the latest cookbook from my favorite cooking “guru,” Ina Garten. If there were only this one recipe in the cookbook, it would have been worth the price. These are the most perfect steaks ever cooked in a real home. Don’t ever grill a steak again. I’m not kidding.

Source: adapted from Ina Garten’s How Easy is That?

Yield: 2 servings

Ingredients:

2 filet mignon steaks, tied (I’m not sure this is necessary) 8-10 oz. each
1 T. olive oil
½ T. fleur de sel or kosher salt (see below)
1 T, coarsely cracked black peppercorns
2 T. unsalted butter, at room temperature

Process:

Preheat oven to 400°. Heat a large cast-iron skillet over high heat for 5 to 7 minutes. Meanwhile, pat dry the filets mignon with paper towels. Brush the filets lightly all over with the oil. Combine the fleur de sel and cracked pepper on a plate and roll the filets on all sides in the mixture, pressing lightly to help the salt and pepper adhere. The steaks should be evenly coated with the salt and pepper. (I have cut the salt by half as I found the proportion a bit salty. Fleur de sel is pretty expensive, so using kosher salt would be a good substitute. But table salt is too salty.)

When the pan is extremely hot, add the steaks and sear evenly on all sides for about 2 minutes per side. (Be sure the cooking area is well ventilated.) You will need about 3 turns to sear the sides and about 10 minutes total. Remove the pan from the heat and arrange all the filets flat in the pan. Top each with a tablespoon of butter, then place the pan in the oven. Cook the filets for 8 to 12 minutes to 120 degrees for rare and 125 degrees for medium-rare. Remove the steaks to a patter, cover tightly with aluminum foil, and allow to rest for 5 to 10 minutes. (Don’t neglect this step!) Remove the string and serve.

Baked Potato with Accompaniments

I served my husband a baked potato with garnishes of crème fraiche, chopped chives, and freshly shredded Cheddar cheese. The only thing missing was bacon, but I had to draw the line somewhere.

Brandied Mushrooms

Source: original recipe

Yield: 2-4 servings

Ingredients:

1 lb. button mushrooms, sliced in ¼ -inch slices
1-2 T. butter
Salt and pepper
¼ c. brandy

In a non-stick skillet, melt the butter over medium-high heat. Add the mushrooms, sprinkle with salt and pepper, and sauté until tender and lightly browned. At this point the mushrooms can be kept off the heat. Before serving, reheat the mushrooms and add the brandy to deglaze the pan. Continue cooking until the brandy reduces to a glaze. Serve immediately.

Roasted Yellow Squash, Zucchini and Onions

Yield: 4 servings

Source: original recipe

Ingredients:

2 yellow squash, sliced in ¼ -inch slices
2 zucchini, sliced in ¼-inch slices
1 large onion, halved crosswise, then sliced lengthwise in ¼-inch slices
1 T. olive oil
Kosher salt & freshly ground pepper

Process:

Preheat oven to 425°. Place the vegetables on a large baking sheet. Drizzle with the olive oil and sprinkle with the salt and pepper. Mix the vegetables until coated with the oil and seasonings. Bake for 45-60 minutes, stirring occasionally, until tender and browned around the edges.

Red Velvet Cake

I didn’t make it ,and I didn’t serve it. While I bought a “serving” from Calandro’s, we were too full to eat dessert! But it is the perfect Valentine’s Day meal.  Maybe next year.